Carving for beginners: we make beautiful decorations for festive dishes. Carving - what is it? Fruit carving for beginners
The aesthetics of the food is just as important as its taste. That is why table decoration with carved figures of vegetables and fruits is used by chefs around the world. The technique by which products are made into real works of art is called carving. In fact, this is a primitive form of engraving that anyone can learn.
The history of carving began many centuries ago, when Asians tried to embellish their meager diet, saturated with predominantly vegetable dishes. To Europe carving from vegetables and fruits
came not so long ago, but, noticing how elegant and unusual the festive table becomes, many chefs began to actively learn this art.
In addition to restaurant carving, there is a home direction in which the housewives independently arrange everyday or festive meals. In our article, we will teach you how to make elementary decorations from fruits and vegetables.
Carving tools
Creating vegetable and fruit decors requires patience and some skill, so be prepared that not everything will work out the first time. However, if you decide to seriously study carving in practice, stock up on a set of special tools:
- Thai knife (the most important element of the set);
- knives with different triangular sections;
- oval knives;
- spoon-noisette, with which hemispheres and balls are cut;
- a long knife for the initial processing of large fruits;
- knife for working with watermelon and pumpkin;
- carbovochny groove knife;
- scissors.

For the manufacture of simple jewelry, you can get by with 2-3 kitchen knives with different lengths and widths of blades, as well as scissors.
Fruit and vegetable carving: step by step photo for beginners
Let's start with the most basic vegetable decorations and tell you step by step how to do it. chrysanthemum from Beijing cabbage. The work steps are as follows:
- Buy a head of Beijing cabbage weighing 300-700 gr.
- Remove the top leaves and cut off the loose part of the cabbage head, leaving a piece about 150 mm long to work with.
- Take a knife with a triangular or oval section and make cuts along the thick white veins of the leaves (when making a cut, make sure that its beginning is thin, and deeper when approaching the stalk).
- Leave the tip of the stalk about 20 mm undercut.
- Now it's time to remove the large cut leaves (that is, you leave the dense white core of the leaf, and remove the unnecessary part).
- The chrysanthemum should consist of many rows, which are made inside the stalk in a similar way.
- Try to keep the tips of the cut petals thin: then, when interacting with cold water, they can easily bend or curl into rings.
The finished “flower” must be put in a container with cool water for 30 minutes so that the petals take on an elegant shape. The product is ready! It remains to put the chrysanthemum on a dish and decorate with greenery.

cucumber flower
Few people will believe that a stunning lily can be carved from an ordinary fresh cucumber, but we will prove that it is possible! Stock up on a pair of standard carving knives and get started:
- Trim the very tip of the cucumber and leave a piece of vegetable 8 cm long for work.
- Using a flat knife, cut the peel in the form of a petal, without leading to the edge.
- Similarly, cut out the other petals in a circle, maintaining equal distances between them.
- Using an oval knife, make the next circle of petals (inner), following a checkerboard pattern (make as many circles of petals as the size of the workpiece allows).
- Carefully remove the core of the cucumber with a knife.
- Take your scissors and cut the tip of each petal into a triangular shape.
- Dip the flower in ice water to open the petals beautifully.
- Now we make a core of carrots or radishes, supplementing it with decorative cuts.
- Carefully put the core on a toothpick and insert it into the center of the flower.

You can also take the peel of a cucumber as leaves for a lily. You will see: your family will be shocked by the extraordinary creative abilities of the mother-cook, and children will start eating vegetables and fruits without whims, because it is much more interesting to eat a cabbage flower than standardly cut products. We have mastered the simplest cucumber carving, and now we will consider what can be made from carrots.
Carrot carving
 Carrots are known for their beneficial properties, but many children refuse them. Having made a beautiful bright flower out of a vegetable, you will interest your child and surprise your family. So, take a Thai knife and a medium-sized carrot for work. If there is no special knife, feel free to take an ordinary kitchen knife, but always with a sharp and thin blade.
Cut out a rounded shape from a carrot up to 4 cm in diameter, which will be the core of the flower, and make a mesh-shaped pattern on it. In the remaining cylindrical part, cut grooves in a circle, trying to keep equal intervals. From the blank with beards, cut thin rings with corrugated edges that will act as petals.
On all sides of the core in its lower part, make deep cuts, adhering to a checkerboard pattern. Insert the petals, trimming if necessary. The carrot flower is ready, it remains only to decorate it with green petals from the peel of a cucumber.
watermelon basket
You can beautifully serve fruits on the table with the help of a basket carved from a watermelon or melon. To do this, first draw a line in the center of the watermelon, which will be considered the beginning of the base of the basket. Then you need to cut out a template for a future pen from paper.

To beautifully cut a lemon or orange, make grooves in the peel with a knife, and then cut the fruit into thin rings. Also, citrus fruits are cut in the center in the form of a crown, as a result of which we get 2 flowers with sharp teeth from one fruit. The remaining pieces of zest can not be thrown away, but used to prepare a healing decoction for.

apple carving
Take a large hard apple and cut off the top of it in the form of a cap. Then, with a thin knife, draw a rim inside the pulp, stepping back 5-7 mm from the edge, and cut the peel into large teeth. The base of the flower is ready. In the same way, you need to cut out the petals in the middle of the apple, but do not forget that it is important to stick to a checkerboard pattern.
On average, a large fruit produces a flower with 4 rows of apple pulp petals. As a rule, when making decorative figures from fruits, there are leftovers that are a pity to throw away. For example, an apple can be crushed and used as a face mask.
Tip: since the apple quickly oxidizes, and its flesh loses its presentation, cut out the decor just before serving!

Carving is an art for dreamers. With it, you can unforgettably decorate tables for children's parties by composing hedgehogs from pears, and butterflies from kiwi or apples. Together with a child, you can lay out a palm tree from bananas and kiwi right on a plate or make a ship out of a melon. Try, experiment, and enjoy your meal!
Carving from vegetables and fruits: video for beginners
apple star
Carrot Rose
rose from watermelon
For those who do not tolerate monotony and dullness in the design of dishes, we suggest that you familiarize yourself with this article.First of all, everyone should be aware that any art requires diligent practice. Only in this case can positive results be expected. Naturally, before proceeding with practical actions, it is necessary to study the theoretical foundations. Having received theoretical training in the form of photo and video materials, you need to acquire the necessary ones, after which you can safely proceed to the most interesting process.
The basic techniques of culinary carving for "dummies"
The main thing that beginners need to understand and remember is that most of the success directly depends on the choice of quality tools. It’s worth starting with the simplest appliances and the simplest crafts. Gradually, acquiring skills and dexterity, you can move on to more. We offer you to watch a few videos that will serve as an excellent theoretical lesson and a source of inspiration.Simple die cuts for carving
Perhaps, cuttings are the most elementary devices for carving. It will not be difficult for a beginner to make beautiful figures and patterns from vegetables and fruits using these devices.Spiral cutting
Thanks to the tools designed for spiral cutting, every carving master, regardless of the level of professionalism, will be able to create amazing edible garlands, spirals, curls.Thin shavings from a serpentine cutter
With the help of a serpentine cutter, which rather resembles a pencil sharpener, you can remove whole thin chips from vegetables and fruits, from which you can make original ones. Even a child can handle this tool.Cannelling
What does fluted mean? In other words, covered with flutes, and flutes are called peculiar cuts and grooves on the surface of the product (cucumber, carrot, lemon). With the help of the cannelling technique, you can come up with original decorations in the form of flowers for dishes.Figured calibration cutting
A special calibration knife is used here, which gives vegetables and fruits curly cuts. Suitable for cutting even the hardest vegetables.Hemispheres Noisettes
Noisettes will help cut even balls and hemispheres from any vegetables and fruits. With this tool, you can easily extract the pulp of the fruit.Breathe life into boring and monotonous decoration of dishes! Give a holiday to yourself and your loved ones!
15-10-2014, 21:29
To make a chrysanthemum, you need a small bulb. At your discretion, you can use a white or red onion. A more beautiful flower is obtained from a small bulb. The thickness of the onion walls also affects the quality of the flower. Petals from a thin-walled bulb are more elegant.
25-12-2014, 21:27
The success of the work depends on the right vegetables. Vegetables should be the freshest, natural, regular shape, without bumps and damage. We offer you to get acquainted with the tips for choosing vegetables for carving.
25-12-2014, 21:27
Before you start cutting patterns on vegetables and fruits, remember that some of them lose their presentable appearance when interacting with air. To prevent this, try to remember a few simple rules.
25-12-2014, 21:27
We suggest you learn carving in practice. Three ways are presented to your attention: how to cut a swan out of apples. Let's get started with useful stuff!
25-12-2014, 21:27
Since you already know how to make beautiful flowers from onions, add another neat flower to your piggy bank of practical creations that can be made from a fresh tomato. Watch and practice!
25-12-2014, 21:27
Our tips will help you to serve your dishes more varied. Try to cook an adorable turtle and a fun eggplant penguin!
Food has long ceased to be just a means to satisfy hunger, it has become an art, and carving is a confirmation of this. The history of carving is very interesting - for the first time the skill of figured cutting of vegetables and fruits originated two thousand years ago in Thailand. And if court cooks in ancient times carved flowers, animals and birds from fruits, then modern cooks turn a watermelon into an elegant carriage, and a ballerina is cut out of a zucchini. As they say, there is no limit to human capabilities! Carving can be learned at home, and you don't need to be a professional artist to do it - just have a good set of carving tools and know some of the intricacies of this science.
Let's try to understand how to make carving at home - these skills will come in handy for serving a festive table if you want to surprise guests and loved ones. When you learn how to make flowers from vegetables and fruits, the dishes will look spectacular and festive, because the main goal of carving is to make our life more beautiful.
Fruit and vegetable carving tools

In stores you can see a lot of carving tools - knives, recesses and chisels, with the help of which experienced chefs cut flowers, petals, geometric shapes and other decorations.
The most popular device is a Thai knife, specially designed for cutting patterns on vegetables and fruits. It is especially suitable for working with hard vegetables - celery, pumpkin and zucchini. The engraving knife is suitable for cutting very complex patterns that the Thai cannot handle. Triangular carb knives come in different sizes and are designed to create leaves - such knives are called "dovetail". When working on an ornament with round cuts, an oval knife is used. A very good and useful tool is a sickle-shaped knife for working with pumpkin, melon, watermelon and other large fruits with a hard peel.
The reversible nuisette spoon with cups of different shapes is ideal for cutting hemispheres, balls and various figures from the pulp of fruits, as well as for creating round indentations, such as the core of a flower. Sometimes a noisette knife is used for this purpose. Spike knives with soft blades are designed for openwork patterns, which are considered aerobatics in the art of carving. Culinary chisels with wavy edges and a square section are popular in carving, which are specially created for creating Chinese patterns and fancy Japanese characters. Peeling knives and cannelling knives are very convenient - cutting strips and decorating decorative recesses and grooves.

A serpentine cutter allows you to peel in the form of spiral chips and works like a pencil sharpener, and a knife for Korean carrots neatly and beautifully cuts vegetables in the form of straws. Many housewives get curly carving cutouts that resemble metal cookie cutters - they are ideal for cutting fruits, and in the photo you can see what shape they come in.
For finishing touches when cutting vegetables and fruits, special carving scissors are used - they can bring the ornament to perfection. Peeling knives remove a very thin layer of peel, and if you cut a long strip, you can make a spectacular rose from it. A calibration knife is the easiest way to make curly cuts of vegetables and fruits, even if they are very hard, so it must be in the kitchen arsenal of every housewife.
You will also need a utility knife for cutting fruits, a vegetable peeler, a vegetable cutter, a spoon for peeling melons and pumpkins from seeds. The kitchen of a vegetable and fruit carving lover sometimes resembles a workshop with a variety of tools, many of which most people have never held in their hands. Periodically, tools need to be sharpened, since it is impossible to cut a beautiful pattern with blunt knives.
When choosing tools for vegetables and, especially when it comes to beginner carving masters, give preference to stainless steel equipment, since this metal does not rust or deform. It is important that the tools have an ergonomic handle so that you feel comfortable holding them in your hands - the quality of the work also depends on this. After work, the knives are wiped dry and stored in closed cases with soft upholstery.
Choosing fruits and vegetables for carving

The beauty and durability of fruit and vegetable compositions depend on the quality of the fruit, so choose only firm fruits without dents and with an intact skin. Peel vegetables and fruits immediately before cutting, and not in advance, because some fruits, such as carrots, become too brittle and unsuitable for carving when peeled. Cucumbers choose hard ones with small seeds and without pimples, tomatoes should be with a dense skin, not loose and not juicy.
Choose strong and fresh onions that haven't sprouted green arrows, and don't cut off the rhizome or the bulb will fall apart. Interestingly, it is easier to cut spiral decorations from slightly wilted carrots; in extreme cases, it can be soaked for two hours in a saline solution, for which 400 g of salt is dissolved in a liter of water. Radishes should be firm and round, but oversized radishes and daikon tend to be loose and porous. By the way, finished radish products are well stored for two days in cold water. Ideal gourds for carving - round, soft-skinned and hard-core, they love frequent spraying with cold water - this gourd looks fresher and brighter.

Peppers should be firm, Beijing lettuce should be firm, and the best melons should be thin-skinned and free of dents. Potatoes, smooth and without sprouts, are best kept warm for three days - this way it is easier to cut out shapes and spirals from it. The lemon should have a thick skin, and the beets should be soaked for 15 minutes in cold water before carving. After cutting out the decorations, it is recommended to spray the beetroot more often, as it dries quickly and loses its aesthetic appearance. Papaya is better to take slightly unripe, with a dark green skin, like a mango. At the same time, the mango is kept before carving at room temperature for three days, then its pulp is soaked in salt water for 15 minutes immediately before work, then the mango will not darken.
When choosing a watermelon, you should pay attention to the presence of a thin peel and small seeds, and pears and eggplants are soaked in a mixture of salt water and lemon juice before “cutting” so that they do not darken.
Finished products are immersed in cold water, which allows them to keep their freshness for a long time, and apples are sprinkled with lemon juice to preserve their color. The fruit and vegetable composition should also be sprayed every half hour with ice water.
Carving at home for beginners

For beginners who decide to start carving from fruits and vegetables, it is easier to start mastering this art with the simplest things - for example, making a chrysanthemum from Chinese cabbage. To do this, tear off loose leaves, remove a small part of the top and cut along the veins of the leaves with a carb knife with a triangular or oval section. Direct the knife from the top of the leaves to the base of the head, making cuts of different lengths, while the depth of the cuts should increase closer to the stalk. Next, remove the cut green leaves, not reaching the base of the cabbage by about 2 cm. Now do the same with all rows of cabbage leaves, reducing the length of the petals as you approach the middle. Put the resulting "chrysanthemum" in ice water so that it acquires a more elegant shape.
Carving at home for beginners can be quite successful if you try to make an original flower from a long, dense cucumber and carrots. To do this, cut a piece 7 cm long from the cucumber, remove the tail and divide the cucumber into 6 parts, making notches with a knife. Cut the petals about 2 cm short of the base, deepening the knife to the middle of the cucumber. Round the petals, decorate them around the edges with cloves and separate the skin from the pulp. Hold the cucumber flower in water and it will open spectacularly, and then cut the core out of the carrot - the green and orange colors are very suitable for each other! You can see the basic carving techniques from fruits and vegetables in the photo.

For a festive table, you can make a fruit basket from watermelon - an incredibly beautiful dish will delight everyone. To do this, divide the watermelon into two parts with a horizontal line, lightly running the tip of a knife over it. On the top of the proposed watermelon basket, draw the outlines of the future pen using a heavy paper template. Cut the handle with a sharp knife, remove the top quarters of the watermelon from both sides to the horizontal line and scoop out all the pulp from the “basket” with a spoon, leaving about 2 cm of pulp on the handle. Cut openwork patterns on the handle and make a spectacular rim. Fill the basket with fruits and serve!
Apple "swans" are quite suitable as an example of fruit carving for beginners, since they are made quite simply. Cut the apple into halves, put the slice on the table, cut a strip about 1 cm wide from the top and make cuts on both sides, not reaching the core. The more cuts you make, the more beautiful the bird will turn out. From the cut out middle strip, make the neck and head of a swan and insert it into the hole. Luxurious swans are ready to decorate any dessert on the festive table, just do not forget to sprinkle them with lemon juice so that the apple does not darken.

For beginners in carving, you can try to make a tangerine flower, and only then create more complex compositions from vegetables and fruits. For the flower, divide the tangerine into six parts with a knife, drawing lines with the tip of the knife, and then cut the peel along the lines, without touching the pulp of the fruit. Bend back the tangerine petals, but do not separate them from the base, and cut small holes in each petal with a knife. You will get six tiny petals, from which you will lay out a flower and decorate the top of the tangerine with it. Fasten the petals with a toothpick, putting a grape on it, which will become the core of an unusual orange flower.
Carving at home for beginners will turn you into a master, just give yourself time. Good tools, quality fruits, useful tips from experienced chefs - and after a while you will learn how to carve real works of art for the joy of your loved ones!

Carving in cooking is cutting vegetables and fruits, which is now widely used by chefs of various restaurants. A beautifully decorated dish is an important element of the modern everyday and festive table, and the figured carving of vegetables and fruits is of great help in this.
The art of fruit and vegetable carving originated in the Far East and has become part of national traditions over thousands of years. It requires great skill, which has been handed down from time immemorial. In different eastern countries, carving is based on different techniques, which differ significantly. In some countries, craftsmen work with a wide range of stencils and notches, and only Thai craftsmen have been carving flower arrangements from fruits and vegetables for hundreds of years. They make their decorations using mainly a Thai knife in combination with various incisors. Thai carving breathes elegance and artistry.

This art today attracts both amateurs and professionals. For a long time, culinary exhibitions, food shows, solemn ceremonies and parties have not been complete without decorating them with carved compositions of vegetables and fruits.

This art is thousands of years old. It is passed down from generation to generation. When you look at such compositions, it seems that it is impossible to cut out such beauty. But you always have to believe in yourself! "If people do it, not gods, then I can learn how to do it," said Mishina A.V. and did it. And I believed her, and began to learn this art myself.

The design of dishes with the help of carving can be very different. Today you have a bouquet of vegetables on your table, and tomorrow - a whole aquarium.

In general, your family will not get tired of being surprised by what they see, and children who refused vegetables, despite all your persuasion, will happily eat whole portions.


I showed you some of my works, do not judge strictly, because I studied on my own, without teachers and courses.
On YouTube, the story of our local television about my carving work.
Who is interested in carving, see my work.
With the help of carving from vegetables and fruits, you can create the most complex decorative compositions and still lifes. Although this art requires special skills, its simplest techniques are accessible to everyone.


Required Tools
To create the simplest works, it is absolutely not necessary to use special tools. A sharp knife with a thin and flexible blade and a little patience is enough. If you are planning to seriously engage in carving, you should stock up on a set of special tools:
- Thai knife: the main tool that is indispensable when carving small parts; has a narrow and short sharpened blade;
- sickle-shaped knife: similar to Thai, but its blade is wider, it is used to cut out larger patterns;
- long knife: looks like an ordinary kitchen knife, but has a narrowed blade; is a universal tool and can be used for any type of carving;

- carving knives for cutting leaves, petals and other floral ornaments: they can be oval, V-shaped, round or square, wide or narrow;
- knives for cannelling (creating grooves);
- small scissors with thin blades to give the edges a decorative shape;
- spoon-noisetto for taking out the pulp;
- carving for removing the core of apples or pears and creating recesses in patterns: it looks like a knife with a circle-shaped tip;
- mini molds;
- girole: a tool for removing the thinnest layer from cheese and other soft products;
- toothpicks and gelatin for fastening parts.


Advice! Finished work can be boiled or fried. For example, making flowers from soft boiled carrots and beets is more difficult. Therefore, figurines are first made, and then they are steamed. Raw potato blanks can be deep-fried.
Preparing vegetables and fruits
Almost any vegetables are used for carving: Bulgarian and hot peppers, radishes, cucumbers, pumpkins, cabbages, potatoes, tomatoes, etc. Of the fruits, apples, oranges, lemons, melons and watermelons are the most suitable for work.
The main thing is that vegetables and fruits are even and smooth, with a minimum amount of pulp and seeds. Overripe fruits will not keep their shape, so you should not use them. Their colors are also important.

All vegetables and fruits are thoroughly washed and dried. Dense vegetables (potatoes, radishes, celery or ginger) are best taken out of the refrigerator first - in the heat they will wilt a little and become more plastic.
Apples and quince, prone to browning, are pre-sprinkled with a solution of vinegar, lemon juice. So that carrots do not break during work, they are soaked in salt water for a couple of hours. Cucumbers and tomatoes should be chosen the most dense, with a minimum amount of juice.
Advice! Fruits and vegetables can be stored in cold water for several days. So that they do not darken, they are sprinkled with lemon juice and diluted gelatin from a spray bottle. Watery fruits are not soaked - during storage they are only periodically sprayed with water.
The simplest examples of carving
With the help of virtuoso carving, you can create unusually beautiful edible pictures and ornaments from vegetables and fruits. However, the simplest works can be quite spectacular - the most important thing is to apply diligence and ingenuity.
We present to your attention the simplest carving of vegetables and fruits with a step-by-step photo:
- you can make an original flower using an ordinary potato peeler - for its petals it is enough to cut the thinnest layer in a circle, for example, from a radish, roll it into a tight spiral with the pulp inside, and then straighten it;
- from a pumpkin, watermelon or melon, you can make a spectacular basket or stroller for fruit, ice cream or pastries; for this, it is better to pre-prepare a paper pattern and cut the edges and handle along it with a sharp knife; such a product can be decorated with carvings in the form of a floral ornament;


- from a small pumpkin, funny cups are obtained in the form of a head of a tiger cub, a cat, a bear cub or a monkey; ears and other parts are glued with gelatin; instead of eyes, halves of olives or pieces of eggplant are used;
- you can get bright callas from hot pepper in a couple of minutes, if you cut it lengthwise from the stalk to the very tip, carefully remove the seeds along with the stalk, and then round the edges of the pepper with a knife; now, closer to the edge of the pepper, we make a small hole and insert the seeds into it along with the stalk; bright flower is ready.


Advice!To obtain through holes in a thick-walled pumpkin or zucchini, you can use a drill or drill.
Watermelon crafts
Pirate ship


Turtle


More ideas


Spectacular dark burgundy roses
From the thin edges of the foliage of red cabbage and cucumber "cups" you can make unusual flowers. For this:
- the upper coarse leaves are removed from the cabbage;
- thin scissors cut off the edges of sheets 2-3 cm wide;
- petals are formed from the received stripes: on one strip, depending on its length, there can be 2–3 or more;
- the round tip is cut off from the cucumber and the pulp is removed; the edges of the resulting cup are shaped with cloves using scissors;
- ready-made cabbage petals are carefully inserted into each cucumber cup;
- in this way, several roses are prepared: buds are made from tightly twisted petals, and fully bloomed flowers from straightened ones;
- the stem is made from the pulp of any dense vegetable - for example, a radish or a vein of cabbage; to make it green, an onion feather is put on it;
- each flower is attached to the stem with a toothpick;
- foliage can be cut from a leek or green apple.


Advice!In the carving technique, the most important place is given to the sharpness of the tool. Poorly sharpened knives or knives made of poor quality steel will crush the workpiece.
Photo master class on creating roses from strawberries


Dahlia
More complex work is more convenient to perform with the help of special tools. For this work, you will need an oval billet of potatoes or large carrots, slightly flattened from the sides. It is better to take carrots without a pronounced core - otherwise the flower will exfoliate:
- to begin with, we retreat a couple of millimeters from the edge and cut out 7-9 petals in a circle with a medium-sized oval knife; the knife should enter the pulp deep enough, but not to the very edge of the workpiece;
- preparing the second row of petals; for this, we cut off part of the pulp under the petals of the first row; you don’t need to delete too much - the number of rows should be as large as possible;
- the tongues of the flower have different sizes, so they should be cut with different knives;
- the last we make out the core with the thinnest knife.


Advice! The resulting masterpiece can be preserved for a long time if it is first dried in the attic or near the battery, and then varnished. Of course, it will no longer be possible to eat it after varnishing.
Salads, meat or fish dishes can be decorated with elegant snow-white chrysanthemum. To make the petals thin and lie naturally, it is better to take a small thin-walled bulb:
- after cleaning, it should be slightly cut off the top and bottom (no more than half a centimeter);
- with a thin knife, cut the onion crosswise, not cutting to the bottom of 0.5 cm;
- the incision should begin from the upper part from which the feather grows;
- if the cut is shallow, then the flower will not open well, but if the head is “opened” almost to the end, then it may simply fall apart;
- again cut the onion crosswise so that the cut line falls on the center of the previous cuts;
- we continue to make cruciform cuts to get the maximum number of slices;
- no need to try to separate the slices with your hands, otherwise the flower will break; you just need to put the bulb in cold water for an hour - the chrysanthemum will bloom by itself; if the onion walls are denser (depending on its variety), it may take more than an hour for the flower to bloom;
- to color chrysanthemum, you can dip it in food coloring, beetroot, cherry juice, blackcurrant juice, red wine or saffron infusion; You can shade not the whole flower, but only its tips.

 Floral theme - a favorite for carving specialists
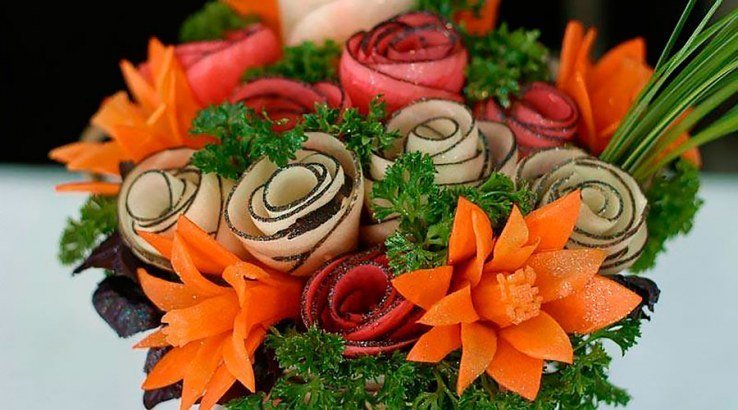
Advice! Bulb flower may have larger segments. To make it, it is necessary to cut only the top two layers into four parts, carefully straighten the first layer of petals, and remove the second with a knife. Do the same with the next layers. In the finished flower, the petals are staggered relative to each other.
Rosette of tomato, orange or lemon
To make this bright flower, you will not need special tools - only a sharpened knife:
- cut the tomato in half;
- cut the resulting half into small equal semicircular slices;
- “stretch” the chopped tomato on the board, trying not to displace any of its parts;
- gently twist one of the edges of our figure;
- to move the finished flower to the dish, you should clasp it on both sides with your hands and squeeze it tightly;
- With a small sharp knife, cut out a couple of green leaves from the skin of a cucumber for a rose; you can make them from thin strips of cucumber, folded in half; Making an orange rose is very easy.
- the upper leaves and the rough lower part of the stalk are removed from the head of cabbage so that the leaves do not fall apart;
- its upper part is cut off almost in half so that 12-15 cm remain from the place where the leaves are attached in the area of the former stalk;
- we will work only with large veins of cabbage, its green parts are completely removed;
- thin sections of different lengths are made along the veins with a carb knife from the top to the center of the head; closer to the stalk, the knife goes deeper - we should get petals that are thin at the edges and denser towards the center;
Advice! Decorations must be combined with the dish to taste. It is better to decorate hot fish or meat with tomatoes, carrots, cucumbers. Sea delicacies are in perfect harmony with lemon. Fruit is the perfect decoration for dessert.
To work, you will need an oval or triangular carb knife with a special groove and a small tight head of Chinese cabbage:
Advice! To master the carving of vegetables and fruits for beginners (see photo), it is absolutely not necessary to purchase a whole set of tools. Some of them can be made independently. For example, you can make a carving knife using a thin olive lid. It is bent at an angle so that a groove is obtained. For carving, you can use any wood carving tools.
multi-petalled radish flower
You can quickly make such a flower with a regular sharp knife. To do this, the upper and lower parts are slightly cut off from the radish and several parallel cuts are made on the sides of the root crop. The more often they are located, the more elegant the flower will turn out.

The second radish is cut into thin circles-petals. The resulting petals are carefully inserted into the slots of the first radish.
It is better to master the carving of vegetables and fruits from a photo or video.